As the leaves start to fall and the temperatures dip, RV enthusiasts face a common dilemma: how to keep their cozy mobile homes warm without breaking the bank. Enter DIY RV skirting, the ultimate solution for those who want to stay toasty while saving a few bucks. Think of it as a warm hug for your RV, shielding it from chilly winds and pesky critters looking for a winter getaway.
DIY RV Skirting
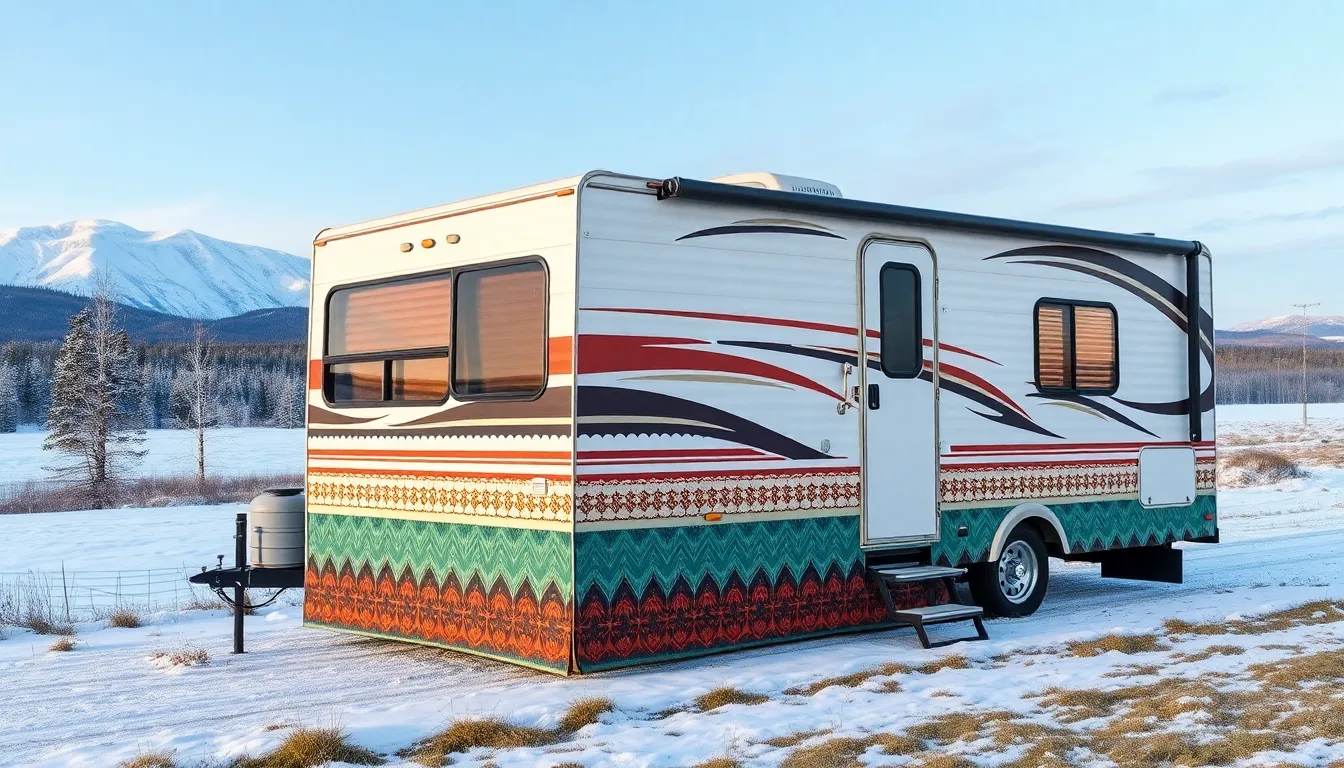
DIY RV skirting serves as a practical solution for RV owners facing cold weather. Providing insulation, it helps maintain interior temperatures without relying solely on heating systems. Many enthusiasts choose DIY options to save on costs while ensuring functionality.
Different materials work well for skirting, including vinyl, fabric, and plywood. Vinyl offers durability and flexibility. Fabric skirting is lightweight and easy to install. Plywood provides a sturdy and long-lasting option, though it may require more effort to set up.
Creating effective skirting involves measuring the RV’s undercarriage accurately. Gaining precise measurements ensures proper coverage, preventing drafts and heat loss. Securing the skirting in place is crucial. Options for securing include stakes, weights, and adhesive strips.
Installation can vary depending on the selected material. For instance, fabric can be attached with Velcro or clips, while plywood may require screws or brackets. Multiple fastening methods exist, allowing users to customize their approach based on the environment and their specific needs.
Benefits of DIY skirting extend beyond insulation. It also protects the RV’s plumbing from freezing temperatures. Many RV owners report increased comfort levels while using skirting, making it easier to enjoy outdoor living in winter.
Ultimately, effective RV skirting enhances the overall experience for cold-weather camping. By choosing to build it oneself, owners gain control over material selection and aesthetics. Practical solutions like these contribute significantly to making RV camping enjoyable year-round.
Benefits of DIY RV Skirting
DIY RV skirting offers several advantages, particularly during cold months. Homeowners gain more control over their RV’s warmth and comfort.
Enhanced Insulation
Insulation improvement stands out as a primary benefit. Effective skirting traps warm air underneath the RV, reducing heat loss. Therefore, temperatures inside the RV remain stable despite external cold. Various materials, including vinyl and fabric, provide excellent insulating properties. Each material works differently but delivers significant protection against drafts. By addressing gaps and covering the undercarriage, RV owners can maintain a comfortable living space. Consequently, the need for heating saves energy and costs.
Improved Aesthetics
Aesthetic enhancement remains another compelling advantage. DIY skirting allows customization in design and color, making the RV visually appealing. Options range from matching the RV’s exterior to creating unique styles that reflect personal taste. Moreover, well-installed skirting adds a polished look, showcasing attention to detail. This visual upgrade not only elevates outdoor spaces but also increases overall property value. Customization provides a sense of pride while enhancing the RV experience.
Materials Required for DIY RV Skirting
Choosing the right materials is crucial for effective DIY RV skirting. Various options exist, each providing different benefits.
Common Material Options
Vinyl stands out as a popular choice due to its flexibility and weather resistance. Fabric skirting offers lightweight installation, ideal for quick setups. Plywood provides durability and sturdiness, suitable for long-term applications. Specific materials like insulated panels enhance energy efficiency, keeping warmth trapped underneath the RV. Regardless of choice, each material contributes uniquely to insulation and protection.
Essential Tools
Gathering the right tools simplifies the installation process. A measuring tape ensures accurate dimensions, critical for proper fitting. Scissors or a utility knife facilitates cutting materials to size. Stakes support the skirting’s positioning, preventing movement in windy conditions. Adhesive strips or clamps offer additional securing methods for various materials. A stapler can provide further reinforcement for fabric options, enhancing durability. With the right tools on hand, DIY RV skirting becomes a manageable project.
Step-by-Step Guide to Installing DIY RV Skirting
Installing DIY RV skirting requires careful planning and execution. This process ensures optimal insulation and protection for the RV during colder months.
Preparation and Planning
Begin by measuring the RV’s undercarriage to determine the appropriate length and height of the skirting materials. Accurate measurements prevent gaps and enhance overall insulation. Choose materials based on the specific climate and aesthetic preferences. For example, those in harsh winters may prefer plywood for durability, while others might select vinyl for flexibility. Visualize the placement of the skirting to ensure a seamless fit. Gather all essential tools like measuring tape, scissors or utility knives, stakes, adhesive strips, and staplers. These tools facilitate a smooth installation, making the project efficient.
Installation Techniques
Several installation techniques help secure the skirting effectively. Attach vinyl or fabric with adhesive strips for a quick setup, ensuring the material hugs the RV closely. Use stakes for plywood installations, driving them into the ground at regular intervals for stability. Apply a combination of weights and stakes to prevent flapping in windy conditions. Consider creating a removable skirting system for easier access to the undercarriage. If using insulated panels, align them carefully to maximize thermal efficiency. Each technique provides unique benefits, allowing customization based on the RV owner’s needs and environmental conditions.
Maintenance Tips for DIY RV Skirting
Regular maintenance ensures the effectiveness of DIY RV skirting. Inspecting the skirting periodically helps identify any damage or wear. Look for tears, loose sections, or signs of water intrusion that could reduce insulation.
Cleaning the skirting prevents mold and mildew buildup. Use mild soap and water to wipe down vinyl or fabric materials. A gentle scrubbing brush can address tougher stains without damaging the surface.
Secure fasteners should remain intact to keep the skirting in place. Check adhesive strips or stakes for tightness after extreme weather conditions. Replace any worn-out components to maintain proper insulation.
During winter, snow accumulation could weigh down the skirting. Clearing snow keeps the structure functional and prevents excessive pressure on the materials. Freezing temperatures may also cause materials to become brittle; replacing them before they crack is essential.
Store removable skirting components in a safe, dry location during off-seasons. Proper storage helps extend the lifespan of the materials. When re-installing, ensure the skirting remains clean and damage-free for the best performance.
Evaluate local weather conditions regularly. Harsh climates may require additional reinforcement, such as extra stakes or weighted options. Adapting maintenance practices based on environment enhances the durability of DIY RV skirting.
Each of these maintenance tips contributes to an effective insulation solution. Following these steps ensures comfort while enhancing the longevity and efficiency of the RV skirting.
Conclusion
DIY RV skirting offers a practical and cost-effective way to enhance winter camping experiences. By effectively insulating the undercarriage of an RV it helps maintain a warm and comfortable interior. With various materials available RV owners can choose the option that best suits their needs while also adding a personal touch to their vehicle’s appearance.
Proper installation and maintenance are crucial for maximizing the benefits of skirting. Regular checks and care ensure it remains effective against the elements. Embracing DIY skirting not only improves comfort but also allows RV enthusiasts to enjoy their outdoor adventures year-round. As they prepare for the colder months investing time and effort into this project can lead to significant rewards in comfort and efficiency.